You have no items in your shopping cart.


Setup Guide for ElmScan 5
Step 1: Install OBDwiz software
Click on OBDwiz below, and follow the prompts to install the software:

Step 2: Connect ElmScan 5 to the PC
If the driver for ElmScan 5 does not install automatically, click on the link below to install the driver.
Windows Driver
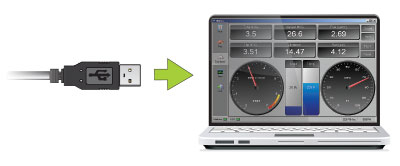
The 'Power' LED will turn a dim red when you connect ElmScan 5 to the PC's USB port.
Step 3: Plug ElmScan 5 into your OBD port
The OBD port is usually found on the driver's side, under the dash.
![]()
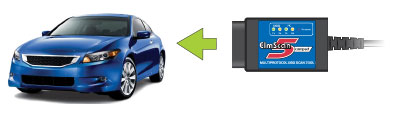
Can't find your OBD port? Visit obdport.info
Step 4: Turn ignition to "Key On, Engine Off" position
The red 'Power' LED will increase in brightness and the Tx/Rx LEDs will cycle on and off from left to right.
Note: Vehicles with push button start: press the button without stepping on the brake pedal.
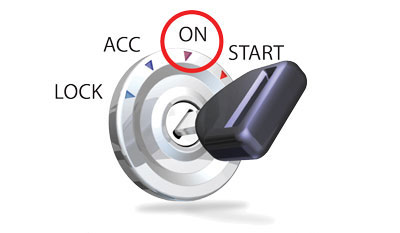
LEDs off? Check OBD port, auxiliary port, and the cigarette lighter for blown fuses.
Step 5: Launch OBDwiz software
Click Start > Programs > OBDwiz > OBDwiz. When prompted, enter the license key.
Your license key is located on the Quick Start Guide included with ElmScan 5.
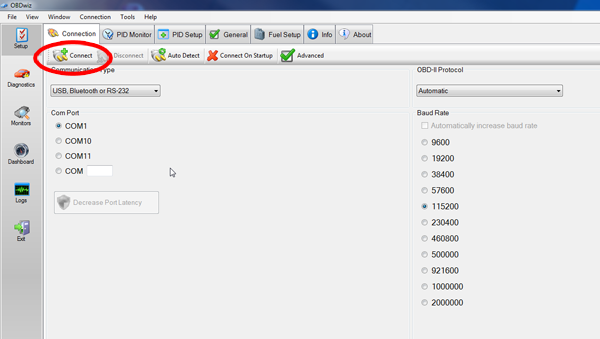
Step 6: Connect to your vehicle
Click the 'Connect' button (circled in red below):
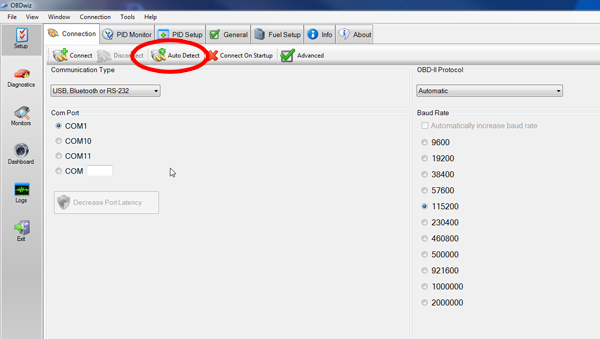
For XP or Vista users only
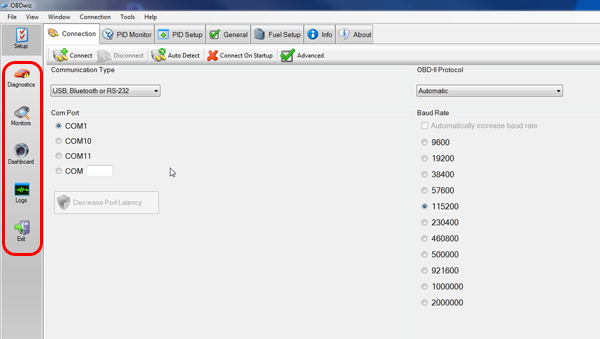
Click the 'Auto Detect' button before clicking the 'Connect' button, circled in red here:
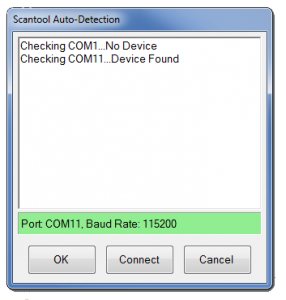
OBDwiz will check all known COM ports and baud rate options and auto-configure itself to work seamlessly with your OBDLink adapter. When Auto-Detect is complete, you will see a dialog box similar to below:
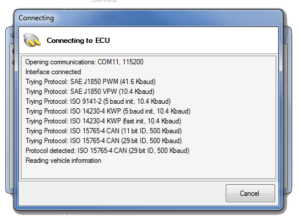
OBDwiz will cycle through all legislated OBD-II protocols and detect which is used by your vehicle. A status screen will indicate progress of the automatic protocol detection:
On many vehicles, there are multiple on-board computers (ECUs) that reside on the OBD-II network.
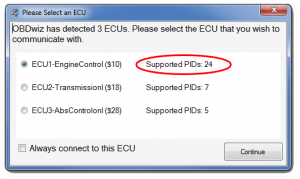
Since OBD-II protocol dictates that you can only connect to one ECU at a time, it's recommended you connect to the ECU reporting the most Supported PIDs first (you can always re-connect and select an alternate ECU). Click 'Continue'.
Step 8: Accessing Data
OBDWiz can diagnose 'Check Engine' trouble codes, monitor real-time vehicle performance, check emissions readiness, log trips and much more. To begin exploring these capabilities, click on a task along the left-hand side of the main screen:
Each task has multiple tabs that provide more specific information or actions associated with the selected task:
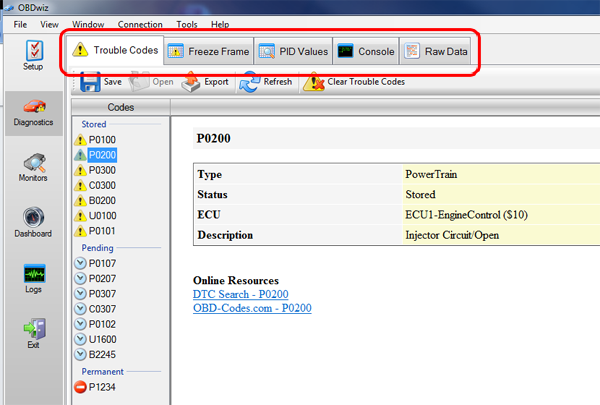
Below each tab, you can click on a specific action button:

